Germinating hemp seeds indoors is a crucial first step for growers looking to cultivate healthy, robust plants. Whether you're a seasoned cultivator or a beginner, understanding the best practices for germinating hemp seeds can significantly impact your crop's success. This guide will walk you through the essential steps, ensuring a high germination rate and strong seedling growth.
Why Germinate Hemp Seeds Indoors?
Germinating hemp seeds indoors offers several advantages:
- Controlled Environment: Indoor germination allows you to control temperature, humidity, and light, providing optimal conditions for your seeds.
- Protection: Indoor settings shield young plants from pests, diseases, and harsh weather conditions.
- Higher Success Rates: With proper care, indoor germination can lead to higher germination rates and healthier seedlings.
Step-by-Step Guide to Germinating Hemp Seeds Indoors
1. Gather Your Supplies
Before you begin, make sure you have the following materials:
- Hemp seeds
- pH-balanced water (pH 6.0 - 7.0)
- Paper towels or cotton pads
- Two plates
- A spray bottle
- Tweezers (optional)
- Small pots with seedling soil or a seedling starter kit
2. Prepare Your Seeds
- Inspect Your Seeds: Choose high-quality, viable seeds. Good hemp seeds are typically dark brown with a slight sheen and no cracks or holes.
- Soak Your Seeds: Place your hemp seeds in a glass of pH-balanced water for 12-24 hours. This softens the seed coat and promotes faster germination.
3. Germination Process
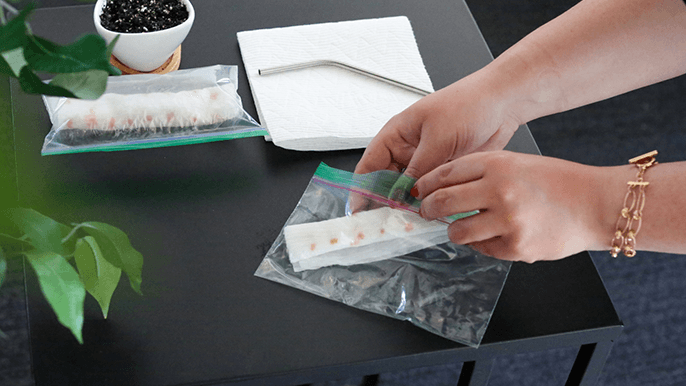
- Prepare the Paper Towels: Moisten two paper towels or cotton pads with pH-balanced water. They should be damp but not soaking wet.
- Place the Seeds: Spread the seeds evenly on one of the damp paper towels. Cover them with the second paper towel.
- Create a Humid Environment: Place the paper towels with the seeds between two plates to create a dark, humid environment. This helps keep the seeds moist and warm, which are critical conditions for germination.
- Monitor and Maintain Moisture: Check the seeds daily to ensure the paper towels remain damp. If they begin to dry out, lightly mist them with the spray bottle.
4. Transfer to Soil
- Check for Sprouts: Within 3-7 days, you should see small white roots emerging from the seeds. This indicates successful germination.
- Prepare the Pots: Fill small pots with seedling soil or use a seedling starter kit. Ensure the soil is moist but not waterlogged.
- Plant the Seeds: Using tweezers or your fingers, carefully transfer the germinated seeds to the pots. Plant them root-down, about 0.5-1 cm deep. Cover lightly with soil.
- Provide Proper Conditions: Place the pots in a warm, light area. A grow light can provide the necessary light spectrum and intensity for young seedlings.
5. Care for Your Seedlings
- Watering: Keep the soil consistently moist but avoid overwatering, which can lead to mold or root rot.
- Light: Ensure your seedlings receive 18-24 hours of light daily. Adjust the height of the grow light to prevent burning the seedlings.
- Ventilation: Good air circulation helps prevent mold and strengthens the seedlings.
Common Issues and Troubleshooting
- Slow Germination: If seeds take longer than a week to germinate, check temperature and moisture levels.
- Mold Growth: Ensure paper towels and soil are damp, not wet. Improve air circulation if mold appears.
- Weak Seedlings: Provide adequate light and avoid overwatering to encourage strong growth.
Conclusion
Germinating hemp seeds indoors can be a straightforward process if you follow these steps. By providing the right environment and care, you can ensure a high germination rate and set the stage for a healthy and productive hemp crop. Remember to monitor your seedlings closely and adjust conditions as needed to support their growth.
Start your indoor germination journey today and watch your hemp plants thrive!

